I’ve spent the last ten years looking at vocational trucks, from sweepers to high-pressure flushers, and I can tell you one thing for certain: a leak is a storyteller. It tells you exactly where your maintenance routine is failing.
When people ask me, "What is the most common cause of sprinkler leakage?", they usually expect me to point to a "bad part." But the truth is more systemic. Whether you’re operating a standard water tanker or a sophisticated dust suppression truck, the root cause is almost always found in the physics of the installation.
The Verdict: The Most Common Culprits
Based on the engineering standards I’ve analyzed (like T/STACAES 006), the primary reason a pipeline fails isn't "old age"—it's interference.
1. Mechanical Friction and Interference
I find that most leaks start where a pipe meets a moving part. According to the technical requirements for vocational vehicles, all pipelines—whether water, gas, or oil—must be neatly arranged and firmly clamped.
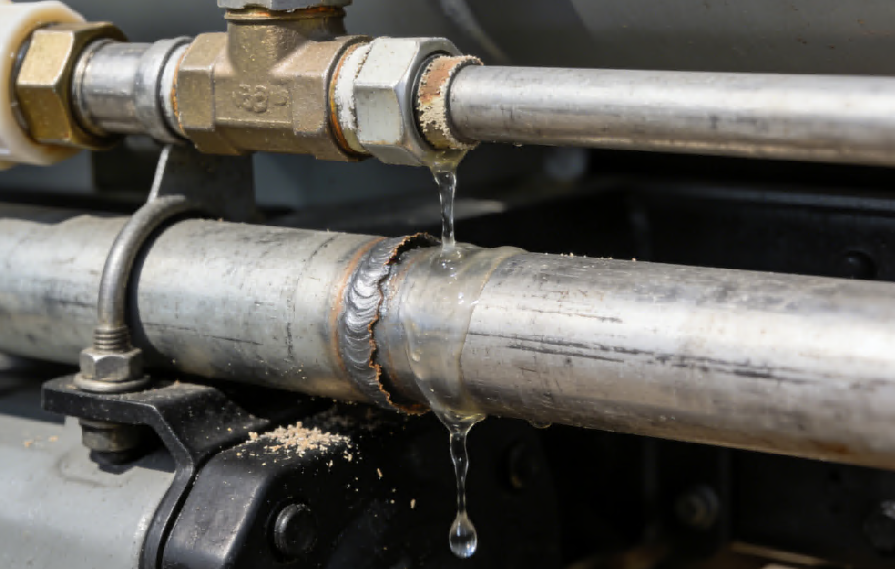
• The Conflict: If a clamp looses or a pipe is misrouted, it begins to rub against the chassis or moving components.
• The Result: Friction eventually thins the pipe wall or wears down the connector until a "Class 2" or "Class 1" leak occurs.
2. Thermal Degradation (The Heat Factor)
Sprinkler trucks are compact machines with a lot of heat-generating components. A very common but often overlooked cause of leakage is insufficient clearance from high-temp parts.
• If a water line is routed too close to the engine exhaust or a high-load hydraulic motor without a heat shield, the seals and the pipe material itself begin to warp.
• Over time, these heat-stressed joints fail under pressure, leading to persistent drips that standard tightening won't fix.
Diagnosing the Leak: The "1.1x Rule"
If you’ve identified a leak, you need a way to prove the repair actually worked. I don’t rely on a "quick look"; I rely on the rated working pressure test.
Hydraulic and Water System Stress Testing
For a repair to be considered "compliant" under industry standards (T/STACAES 005), the system must be tested at 1.1 times the rated working pressure.
• The Procedure: You hold this over-pressure for exactly 10 minutes.
• The Pass/Fail: If there is even a trace of moisture or "sweating" at the joints, the repair is a failure. For high-pressure flushers, this means testing at significantly higher than the standard 10 MPa operating range.
The Pneumatic (Air) System Threshold
Many modern sprinklers use air-actuated valves. A leak here can be invisible until the system fails to open a nozzle.
• The Metric: Pressurize the system to its rated level and shut off the source.
• The Data: In 5 minutes, the pressure drop must not exceed 0.05 MPa. If it drops faster, you have an external leak that will eventually burn out your air compressor.
The Seasonal Factor: Winterization Failures
I’ve seen more pumps destroyed in one week of November than in an entire summer of operation. This brings us to another "most common" cause: expansion due to freezing.
Every compliant sprinkler truck is required to have anti-freeze drainage devices (usually low-point valves). If an operator fails to drain the system before a cold snap, the water trapped in the "dead zones" of the pipeline will expand. This creates hairline fractures in the centrifugal pump casing or the welded joints—leaks that are nearly impossible to find until the ice melts.
Why a Leak is a "Class 1" Safety Hazard
I always remind operators that a water leak is an electrical hazard in disguise. In the world of electric vocational trucks, we use B-Class voltage systems (identified by their orange wiring).
• Insulation Resistance: For these trucks to be safe, the insulation resistance must be >500 Ω/V.
• The Risk: If water from a pipeline leak sprays onto a high-voltage connector that isn't properly rated (at least IPX7 if it’s near the ground), you trigger a Class 1 Fault—a failure involving human safety that can scrap the entire electrical assembly.
Conclusion: Data-Driven Maintenance
So, what is the most common cause of sprinkler leakage? It’s the combination of mechanical friction, heat interference, and improper winter drainage. By following the "firm clamping" rule and the "1.1x pressure" test, you can move from reactive repairs to a proactive, zero-leak operation.
My Pro Recommendation (Next Step): Perform a static 10-minute pressure test at 1.1x your rated pressure during your next scheduled maintenance. If you see a pressure drop or a "sweat" at a joint, don't just tighten the bolt—check if the pipe is rubbing against a moving part. Fix the routing, and you’ll fix the leak for good.
Stay pressurized and keep those pipelines clear!